
A word wall, or a name wall as it is often referred to in preschool, is an important part of any emergent literacy program.
Placing the letters of the alphabet on the wall in your classroom allows you to showcase an organized collection of names, thematic words, or environmental print in a highly visible area.
But don’t worry, name walls in the early childhood classroom are used differently than word walls in the classrooms of older children.
Why are Word Walls or Name Walls Important?
I’m going to refer to it as a name wall for the rest of this post to avoid confusion and to align with the age group we’re talking about. When used as a tool to support emergent literacy instruction, name walls can be very fun and effective learning tools in Pre-K or Kindergarten classrooms. Some people prefer to call it a “name wall” at the pre-k level or an “alphabet wall”, both of which are also acceptable.
A name wall is used as a tool to support emergent literacy instruction in the Preschool or Pre-K classroom for children ages 4-5. It can help students learn the alphabet, letter sounds, the first letter in their name, names of classmates, and the sequence of the alphabet. A name wall is a required component in many high-quality early childhood programs.
What Does a Name Wall at the Preschool or Pre-K Level Look Like?
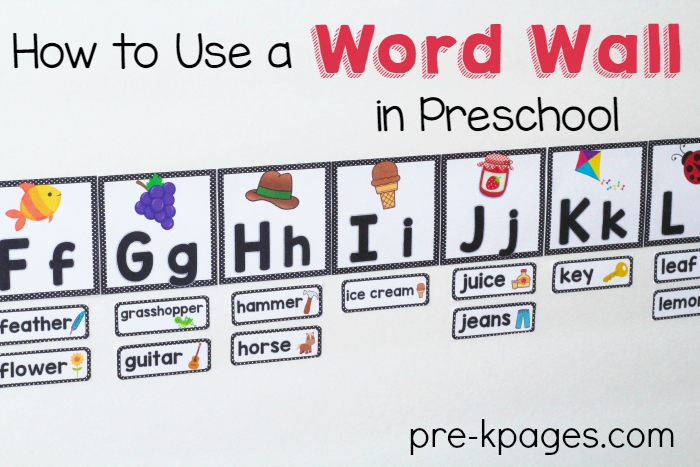
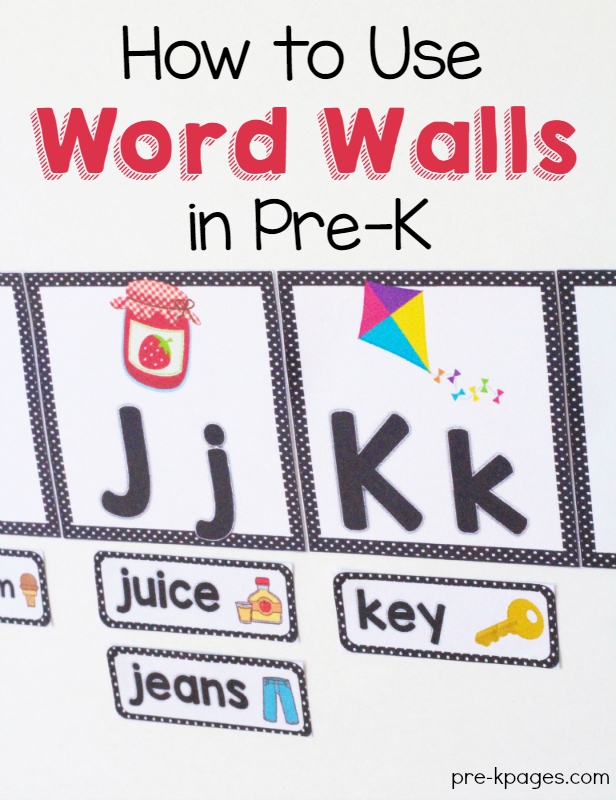
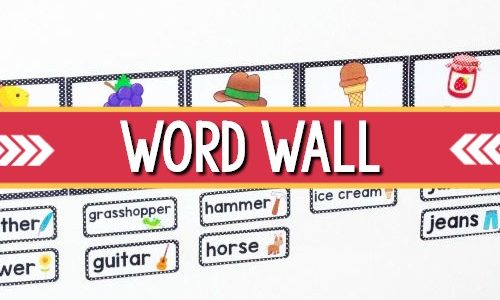
- The alphabet is displayed horizontally across the wall at student eye level.
- Each letter of the alphabet has a corresponding picture that is easily identified by the students.
- The font of the names and words on the word wall is large enough to be easily read from across the room.
- A word wall changes throughout the year as the students learn and grow.
How to Use a Name Wall in Preschool
It is important for the teacher to interact with the word wall often during small group time. Incorporate visual, auditory and kinesthetic means of practicing the words. Add print to your word wall during specific literacy lessons with the students present and actively participating in the placement of the words.
The name wall is a teaching tool, used by the teacher to facilitate literacy learning. Children don’t choose to go there unless they have been interacting with the word wall regularly in much the same way they mimic the teacher during center time by playing “teacher.”
What does a name wall look like at the beginning of the school year?
In the beginning of the year, a name wall can have student’s pictures and names under each letter on the wall. You might also include other members of the staff the students have daily interaction with such as your teaching assistant, principal, or custodian.
Names and pictures of the students are added to the word wall during specific literacy or word wall lessons with the students present and actively participating in the placement of their own names. When you have your student’s pictures and names displayed on the word wall it creates a sense of belonging and a feeling ownership of their classroom.
The first letter of each child’s name is written in red ink to indicate that it is the first letter of their name and therefore the reason why it is placed under that letter on the wall.

What to Put on Your Name Wall
Print used on your alphabet wall is most helpful when it’s meaningful to your children. In preschool, this means the children’s names, certain words they like to write often, such as mom, dad, or love, and some environmental print. You can also include words and pictures used during specific lessons, such as a picture of a lemon to introduce the letter L or the sound it makes.
In kindergarten, a sound wall is used instead of a name or alphabet wall. A sound wall is not necessary in Preschool or Pre-K since the main focus is developing phonemic and phonological awareness skills.
Where to Put Your Name Wall
The biggest challenge of using a name wall is finding adequate wall space. The alphabet is placed on the wall horizontally so the students can see the progression of the alphabet from A-Z, so it’s often hard finding a place to put it.
Want to change the size of your word wall toppers? Make them larger, make them smaller? It CAN be done! Here’s a step-by-step tutorial that shows you exactly how easy it is!
It also helps to have your word wall in the same area that you conduct your large group activities; location, location, location! My word wall is located next to my large group area to minimize transitions.

How to Make a Name Wall
- To start making your name wall, first, find a picture alphabet that will fit in the space you have. Don’t forget, you can change the size of your word wall toppers using this trick!
- Next select your background for your name wall, some suggestions are butcher paper, fabric, or felt. Always check your fire code before putting up a background for your name wall, some cities do not allow two layers of paper or fabric on the wall. When choosing a background make sure it is a solid color so it doesn’t detract from the print on the wall. Once your background is up you can and add the alphabet.
- Take a picture of each student using a smartphone, you can use a regular camera but digital photos are easier to crop and resize. Crop each child’s picture to show just the head, print, then cut out.
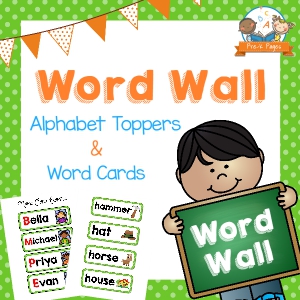
- Print each child’s name on your computer in large point type; I recommend the Comic Sans font. Make sure you type the first letter of each student’s name in red. Mount the names and student pictures on construction paper. If you have both an AM and a PM class you may want to mount each class on a different color to differentiate between the two. After you have laminated the names and pictures, you can cut them out leaving a border around the edges. See word wall pictures at the top of the page for example.
- Gather the students in your large group area and introduce the name wall and the name cards to the whole class. Explain how the first letter of each child’s name will determine where the names are placed. Select a few students and help each one identify the first letter of their names on the name cards.
- Help each student staple their picture/name card below the appropriate letter on the word wall.
Name Wall Activities
There are several fun activities you can do using your alphabet wall throughout the year.
- Greeting: In the beginning of the year when we gather during circle time I will say good morning to each child individually. As we say good morning to a child, he may go to the wall and point to his name for the whole class using a fancy pointer. We may also discuss other students who also start with the same letter and point out their pictures as well. As the student points to his name I try to verbalize it as well; “Michael’s name is after Karen’s name but before Samantha’s on the name wall.” In addition to teaching the sequence of the alphabet this activity also introduces the children to the concept of the name wall and helps them to become comfortable using it.
- Theme Pictures: As you introduce new themes it helps to print out pictures to go along with your theme. For example, when learning All About Me you might print off some pictures of body parts like hand, nose, or mouth, then cut and laminate the pictures. During circle time on the first day of your new theme introduce your picture cards to the children. Hold up the picture of the hand and ask the students what it is. After hearing the correct response repeat the name of the picture several times emphasizing the first sound. Call on a volunteer to place the card under the correct letter on the wall.
- Read and Write Around the Room: I introduce this activity in January after our winter vacation. Several clipboards, copy paper, cool pens, and pointers are placed in a dish tub for the students to use during center time. I explain the purpose of the activity, to find as many words or letters of one type as possible and I give several examples. I model for the entire class how to use the items in the tub daily during the first week. Pointing out print sources all around the classroom, I write on my clipboard and refer to the word wall often. When the students are done with a sheet of paper they may place it in a special Read and Write Around the Room “in-box”.
- Writing Time: Using the alphabet on the wall is a big part of writing time. I encourage the children to refer to the wall often when they are writing in their notebooks. For instance; if a child asks me how to spell the word “blue” I might say, “Oh, that’s on the wall, where should you go to look for that word? Listen to the first sound if you need help.” I try to encourage using the letters on the wall during writing time as often as possible.
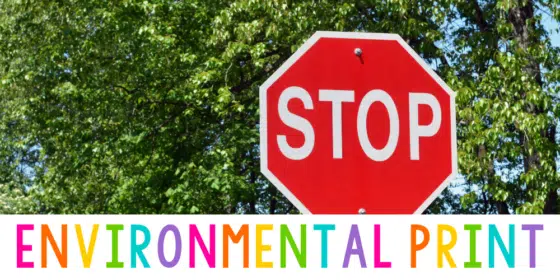
- Environmental Print: I use lots of environmental print on my word wall. To get ideas and learn more about the benefits of environmental print visit the Environmental Print page
Teaching Trailblazers
Using a name wall is important, but it’s only one small piece of the literacy puzzle. If you really want to be the best teacher you can be, the best place to learn about current best teaching practices and get the support you need is in the Teaching Trailblazers. We have many printable lessons and on-demand video trainings to help you become the best teacher you can be! If you want to get on the waiting list for the Teaching Trailblazers, do it soon so you don’t miss the next open enrollment period!


Pingback: Sage & Zoo - Autumn Word Wall
Hello Vanessa,
I am interested in incorporating a word wall nest year in my prek classroom. How do you do your writers workshop? Is it at a certain time or a Center choice each day? Just curious how it works? Hope to get a resoponse.
Ruthann Pinnow
Writer’s workshop is a certain time of the day. It starts with a story/read aloud, a teaching point, and then independent practice where all the students are engaging in writing at the same time. At the end, we gather back together to share some of our work and reflect on the teaching point again. If done correctly, it can be very DAP. Matt Glover suggests offering it as a choice during centers, but in a public school setting that would be difficult due to the large number of children. Hope that helps.
Do you take down certain words after the theme is over? I ask because I have limited space and it gets full fast. I keep their names up there and any sight words we have learned, but I take down the theme vocabulary. I guess a good activity would be to introduce the new vocabulary and let them put it on the wall.
Yes, I do take some words down because you’re right, it does become cluttered quickly.
Hi Vanessa,
Is there a list of the words that come with the word wall set available. My coteacher and I are hoping that this will work for our students but would like to preview that words beforehand.
Thanks for this awesome resource!
There are just a few words for each letter of the alphabet, some letters have two words, others have 3, and a few may have 4 words. All vowel sounds are short. You can see a collage image of the kit here, hope that helps! https://www.pre-kpages.com/products/word-wall-black/
What is the width of the word wall or the Dimensions of each card, please?
You can set your printer settings to print multiple pages on one page to shrink it to your desired size.