In last week’s episode, I discussed how you can help your students develop their fine motor skills before working on their scissor skills.
If you haven’t listened to that episode yet, I invite you to do so, because the tips I gave in that one are going to build the foundation the children will need to develop and hone their scissor skills.
Today, I pick up where I left off. I’ll be focusing more on scissors and what you can do to teach your young students how to use them.
To many, it seems like using scissors is something that’s super easy to do. However, like everything else, it’s a skill, and your students will need to work on it.
How?
I answer this question in today’s episode of Elevating Early Childhood!
Teaching Your Students Scissor Skills
What if I told you that there is much more to scissor skills than just developing fine motor skills? You see, even the children who have well-developed fine motor skills can struggle to use scissors the right way.
This usually happens when the children haven’t been presented with cutting tasks in the proper developmental sequence. Yes, you read this right! When it comes to introducing scissors to small children, working smarter, not harder, is the way to go.
How can you do this? Simply by teaching scissor skills in a way that takes into account how these skills are actually acquired. When we, childhood professionals, take time to introduce scissor skills using the developmental sequence, we’re setting our students up for success.
Here are the seven steps to teaching young children scissors skills:
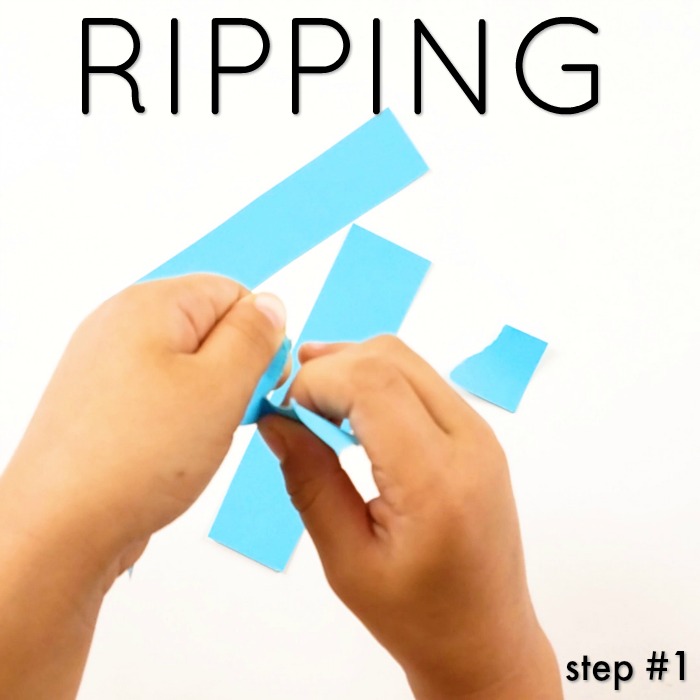
Step #1: Ripping
Yes, the first step in introducing scissor skills to young children does not involve using scissors at all! Your students will be much more successful if they practice ripping paper that’s a bit thicker than regular copy paper.
This is because thicker paper gives more resistance, and lets the children feel how the paper will rip in their hands just a little bit better.
Now, the good thing about this step is that children love ripping paper! And while they’re doing so, you’ll also be able to take a quick informal assessment of their skills. You’ll be able to notice which of them have poorly-developed fine motor skills, and that’ll make it easier for you to help them.
Personally, I like to do a lot of ripping activities at the beginning of the year. I also like to invite my students to crumple the paper, which will help strengthen their hand muscles.
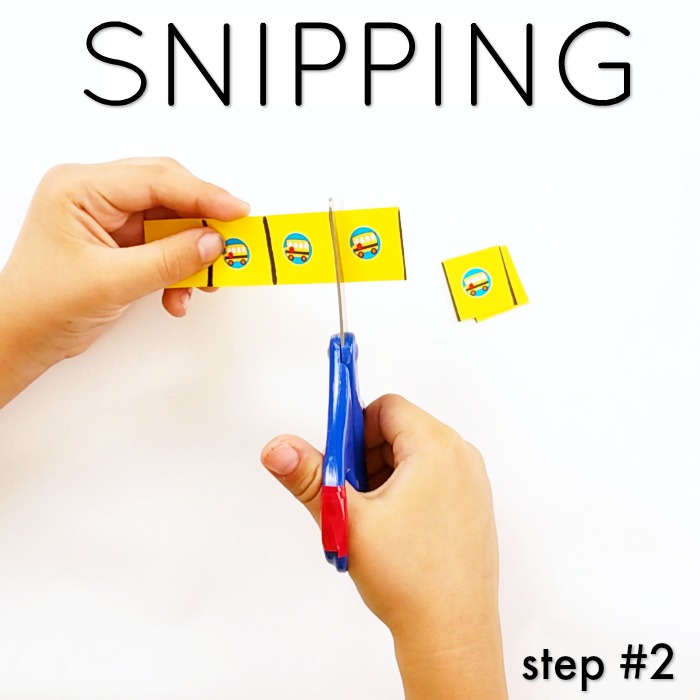
Step #2: Snipping
The second step in this developmental sequence is snipping. This is fairly easy for children to do if they can already rip and have some fine motor skills.
For this activity, I always go with my favorite children’s scissors, blunt tip Fiskars. Something else that you’ll need is a paper with dotted lines on it (you can make this yourself).
And here’s what the children will do: They’re just going to hold the strip of paper in their hands, and they’re going to open the scissors —and that can often be the biggest challenge— wide enough to place the blade right along the strip of paper. And then, they’re simply going to close the scissors and cut through the strip.
This activity is a great way to practice opening and closing scissors, and the goal is simply to cut through the line on the strip of paper.
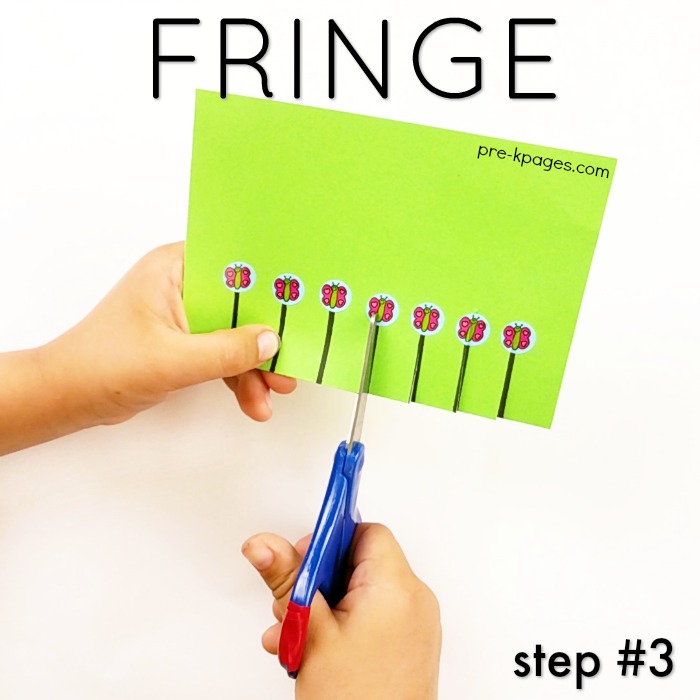
Step #3: Fringing
What is fringing? Simply put, it means cutting to a point. When it comes to fringing, I like to have a space on the paper for the children that indicates where to put their thumbs and where to grip the paper.
Fringing will help the children practice closing the scissors to a point, without continuing on through the paper.

Step #4: Straight Lines
Once your students have mastered ripping, snipping, and fringing, they can move on to the hard part: Straight lines.
Usually, I introduce this step three or four months into the school year, after the children have worked on their ripping, snipping, and fringing skills.
This activity is easy to implement. All you need is a rectangular sheet of paper with a mark showing where the child has to pinch the paper. And of course, scissors. The children will have to grab the paper and start cutting from right to left, as in closer and closer to their fingers (or left to right, if the child is left-handed).
This step teaches the children how to open and close scissors multiple times along a line. Now, some children will be better at this than others, so you might have to work with each of your students individually.

Step #5: Zigzag Lines
This is one of the harder steps, and it comes a lot later in the year for most children. Like for straight lines, you’ll need paper and scissors. Put zigzag lines on the paper and put a little sticker on it to show the children where to grip.
The children will have to cut along the zigzag lines, which is usually much easier said than done. Some children might be worse at it, and that’s understandable. So keep that in mind.
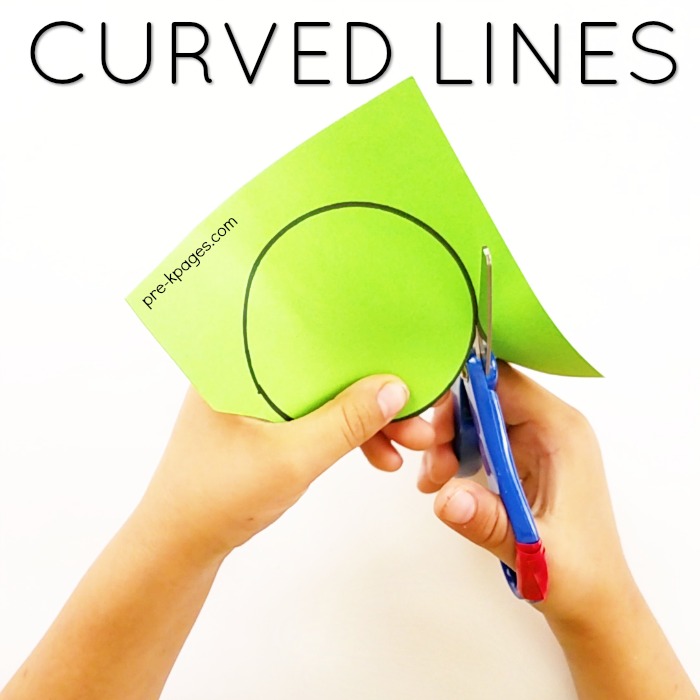
Step #6: Curved Lines
Only after getting the zigzag lines practice down can you move on to this step, which is curved lines. And this is where so many teachers take a wrong turn.
If you present your students with cutting circles and squares too early, it can be super frustrating, not only for your students, but for you as well. Because you’re going to be putting out what I like to call “scissor fires”.
The children are going to be cutting themselves, cutting each other’s hair, cutting their clothes, etc… They’re going to be acting inappropriately with scissors. And that’s because they really don’t have the skills to hold them in their hands yet.
So, you have to take into consideration where your students are in their developmental stages of learning how to cut before moving on to this step.
Again, for this step, you’ll only need scissors and paper with a dotted circle on it (or you can grab my done-for-you scissor skills bundle here). Your students will have to cut the paper following the circle, and that can be pretty difficult. But don’t get discouraged if your students don’t make a perfect circle at the first try!
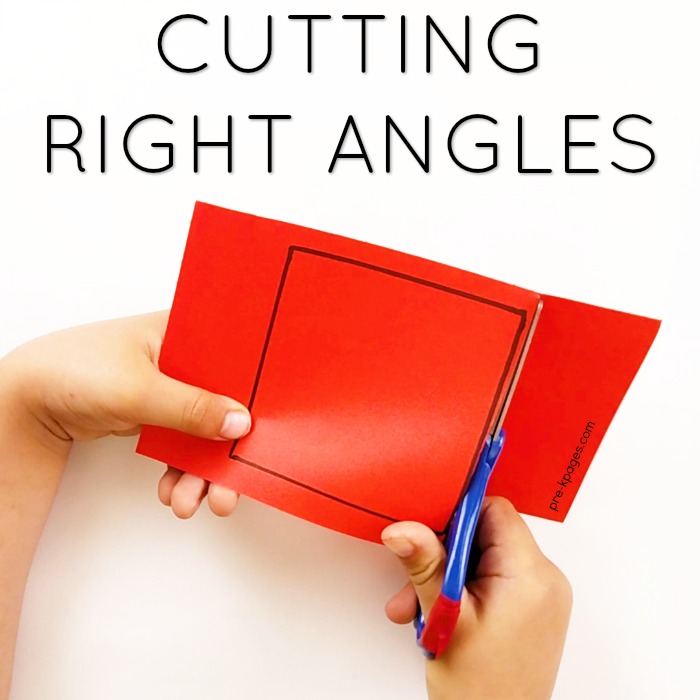
Step #7: Right Angles
The final and most difficult step is cutting right angles, aka squares and rectangles. Again, you’ll need scissors and paper with a square or rectangle on it. The children will have to cut along the square, and that can be difficult for them, because it demands a lot of skill.
Scissor Skills Troubleshooting
If this is the case for your students, then you can provide them with what I like to call “spring back scissors”. These scissors have a small spring in them, which allows them to bounce right back when you squeeze them. They’re easier to handle, and they can be great practice before moving on to regular scissors.