


Are you looking for fun, hands-on activities to teach letter recognition in your preschool or pre-k classroom? This alphabet garden activity is perfect for helping preschoolers recognize the letters of the alphabet. You can use this hands on letter recognition idea at home or in the classroom.
Your kids will have a blast learning letters and practicing fine motor skills at the same time!

Alphabet Garden: Letter Recognition Activity
If you teach preschool or pre-k then you know that learning letters isn’t always easy for young children. All those lines going in different directions can be so confusing for your little learners! That’s why they need lots of fun, hands-on opportunities to practice their letter recognition skills all year long.
Sometimes it can be difficult to come up with fun learning activities to teach the same skill in a variety of different ways that will also engage and motivate your kids.
Shoebox Letter Recognition Activity
Don’t you just love letter identification activities that you can whip up quickly using materials you already have? This alphabet garden letter recognition activity is so simple to make, and it’s easy on the wallet too! Here’s a list of supplies you’ll need to get started.
- Shoebox
- Construction Paper
- Glue Stick
- Pencil
- Knife
- Scissors
- Permanent Marker
- Craft Sticks
- Ruler
- Letter Stickers (optional)

Fun Letter Identification Activity for Preschoolers
First, you’ll need to find an empty shoebox you can spare. If you don’t have a shoebox in your closet, ask a family member or friend if they have one in their closet or garage they can spare.
Once you have your shoebox, you can trace the lid of the box on construction paper and cut out the shape with your scissors. Then, cut your construction paper and use your ruler and pencil to make lines on the paper, these lines will serve as a guide when you cut the holes in the top of the box.

Make a Shoebox Letter Matching Activity
Next, glue the piece of construction paper on top of your shoebox with the lines facing up, towards you.
Now comes the fun part, you can either place stickers on the end of each craft stick, or you can use your permanent marker to write the letters.
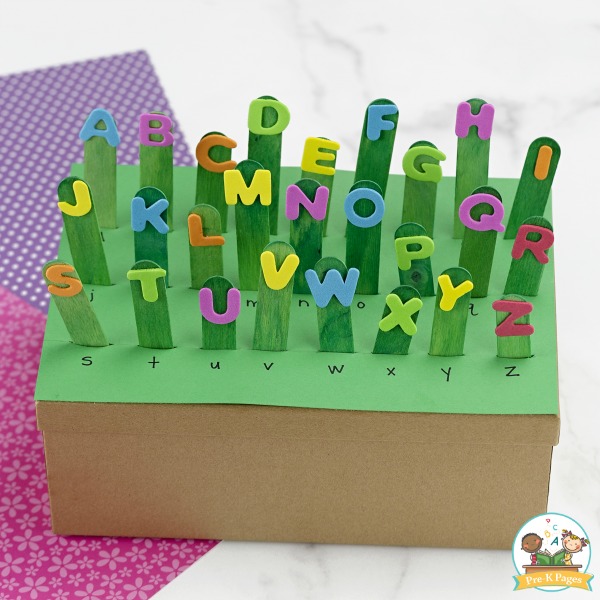
You’re almost done! The next step is to use your knife to cut 26 slits in the top of the box, one slit for each letter of the alphabet. Be sure to make your slits the right size, if they’re too small the craft sticks won’t fit, or if they’re too big your craft sticks will wobble and fall into the box.
After you’ve made a slit for each letter you can use your permanent marker to write the letter under each slit. You can write the uppercase letters on the sticks, and uppercase on the paper to start. When your kids are ready, you can write the lowercase letters on another set of craft sticks so your kids can practice matching uppercase to lowercase letters.