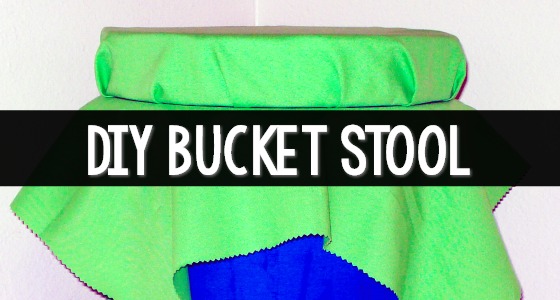


I’m always on the lookout for tools to help with organization and storage in the classroom. Tools that have multiple uses are even better. This bucket stool is great seating in the classroom and a great place to tuck away items for storage. The stools can be customized to fit your classroom theme or decor. And they are easy to make.

Bucket Stool Tutorial
I was inspired to make these bucket stools to use in the classroom after reading about them here. As always, I put my own spin on them so they aren’t exactly the same – only because I’m terrible at following somebody else’s directions.

Bucket Stool Supplies
Here are the supplies you will need to make your own bucket stools:
- Bucket from home improvement store
- Mod Podge
- Fabric: I chose these colors because the stools are going to be used in a blue and green frog themed classroom
- Ribbon: Note, I changed the ribbon out at the last minute because I found some I liked better and I had a coupon
- Foam Brush
- E6000 Glue
- Cardboard
- Foam
- Pinking Shears
- Scissors
- Pencil (not pictured)
- Staple Gun
Bucket Stool Assembly

I traced the lid of the bucket on a piece of cardboard and cut it out with my scissors. Next, I used the cardboard as a template to help me cut the foam to the correct size.

I used E6000 glue to adhere the cardboard to the foam. My staple gun wouldn’t staple through the lid of the bucket so I had to come up with another plan to create the cushioned seat.

I placed the unfinished cushion foam side down on a piece of green fabric. I cut the fabric to fit and used the staple gun to attach the fabric to the cardboard.

When the cushion was complete I placed it on some more green fabric and used my pinking shears to cut a square around it to create the “drape”. Why pinking shears you ask? Because I can’t sew! I also had to hide the large lip on the bucket. A skirt seemed the best way to do it. Another reason is because it reminded me of a lily pad and since these are going into a frog themed classroom I thought it would be a cute touch. I attached the skirt and the cushion to the lid using E6000 glue.
Once the lid skirt was complete I measured the bucket and cut the blue fabric to size. I coated the outside of the bucket with Mod Podge using my brush and then attached the blue fabric about 6 inches at a time smoothing out wrinkles as I went. Then I allowed the fabric to dry for a few hours and used the E6000 glue to adhere the ribbon to the bottom of the bucket. I tried using Mod Podge for this task but it didn’t work.
Because I already had a lot of these supplies on hand, like Mod Podge, pinking shears, brush, staple gun, and cardboard, this project only cost me about $10 total. The fabric was the most expensive part, if I had waited for a fabric sale it would have cost less.
If you like this teaching tip, check out my membership site, Teaching Trailblazers, where teachers just like you are connecting to save time, teach better, and live more.
More Teaching Tips