


It’s important for your preschoolers to have plenty of opportunities to practice their pre-writing skills before they begin writing with a pencil. One way you can make practicing pre-writing skills more interesting is to introduce sensory writing trays. These trays are super easy to put together and make great additions to the writing center in your classroom.
Writing trays provide a fun, engaging, and stress-free way for your little learners to practice pre-writing skills.
Sensory Writing Tray
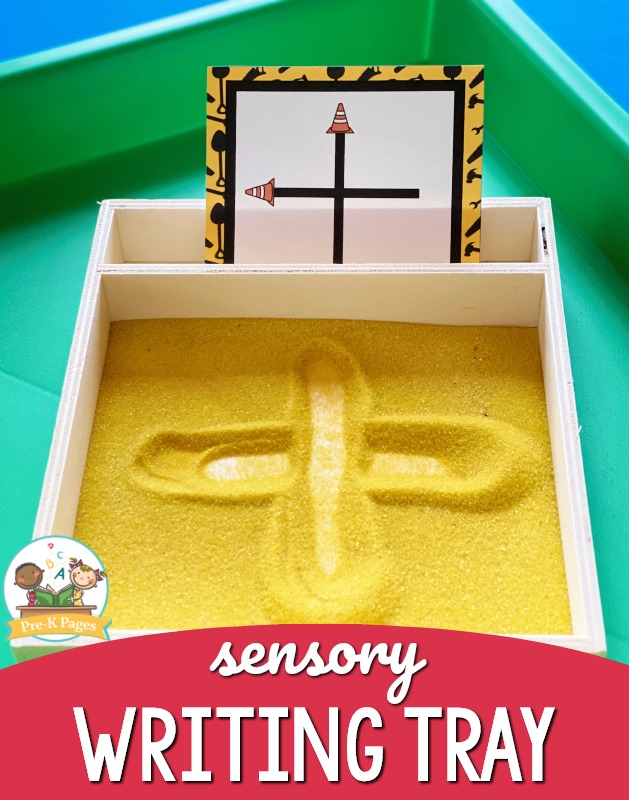
A sensory writing tray is a shallow container filled with any material that can be moved around with a finger to form letters or numbers. The purpose of this tray is to allow young children to practice pre-writing strokes without the stress of trying to write on lines with a pencil. Sensory writing trays make pre-writing skills fun and interesting for your little learners, instead of stressful.
Here’s what you’ll need to make your own sensory writing trays:
- Tray (I found mine in the Target dollar section)
- Material for the tray: colored sand, sugar, or salt
- Optional: gel food coloring
- Pre-Writing Stroke cards

Colored Sand in Sensory Writing Trays
You can use colored sand in your writing trays as pictured here, but colored salt or sugar would work too if you prefer. To color the salt or sugar, pour about 2 cups into a bag, then add a few drops of gel food coloring. Close the bag and shake until the color is mixed. If it’s not mixing well, spread it on the tray and mix with your hands.
Another fun twist is to add a slight scent to the salt, sand, or sugar in your writing trays. Just a drop or two of peppermint or vanilla will make your sensory writing trays even more appealing to your little learners.
When your sensory material is colored and dry, spread it around in the bottom of your tray. You don’t need to add a lot, just a thin layer that covers the bottom of the tray will do. If you add too much sand, sugar, or salt, it may become difficult to make and see the letters in the tray. The goal is to pour just enough material into your tray so when you write with your finger it can be easily seen and recognized.

Sensory Writing Trays for Preschool
Next, add the pre-writing stroke cards to your trays. These cards will serve as a visual model for your kids to look at when they make the strokes. Call attention to the icons on each card, which indicate where the child should place their finger when making the strokes.
Be sure you model how to use the sensory writing trays properly first, to avoid any potential problems that may arise in the writing center.

Using the Tray in Your Writing Center
Then, invite your students to select a card and make the stroke in the bottom of the tray using the index finger of their dominant hand – if they have one.
It’s okay if your preschoolers can’t make the strokes perfectly, they’re called pre-writing strokes for a reason. Of course, you can encourage your kids to look more closely at the strokes when they form the letter incorrectly.
Don’t forget to demonstrate how your students can gently move the tray back and forth on the table to redistribute the material in the bottom.
Young children love sensory writing trays and they make the perfect addition to your writing center, I hope you’ll try them out!
Other Writing Activities and Ideas—
What’s in Your Writing Center?
Dollar Store Writing Center
Gingerbread Man Maps Writing Center
Writing in the Dramatic Play Center


