
Have you ever made class books with your kids? There’s nothing a child loves more than seeing his or her own picture in a book!
Class books help create motivation to read and are great additions to your classroom library.
How to Make Class Books
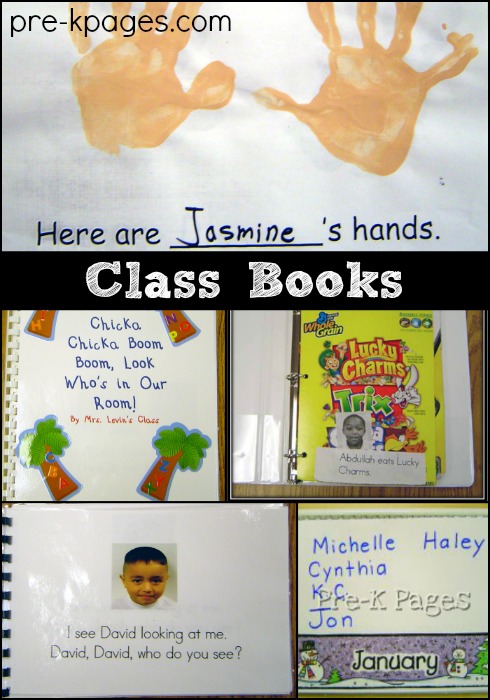
Here Are Our Hands


Materials: white cardstock, multicultural paint
Read Here Are My Hands by Bill Martin and John Archambault. Pre-program as many sheets of cardstock as you have students with the following phrase copied at the bottom “Here are ______’s hands”. Next, paint each student’s hands and have them make prints on their page. If your students are able they can write their name on the blank line, or if they aren’t able you may do it for them saying each letter out loud as you do so, this way they will begin to become familiar with the letters in their names. When the paint is dry bind into a class book.
My Name Is

Materials: white construction paper, boy & girl stencils, paint or crayons, pictures of each student, glue stick.
Pre-program as many sheets of cardstock as you have students with the following phrase copied at the bottom “My name is _________”. Have each child trace stencil a boy or girl on their paper. You can use paint or crayons for the stencil depending on your preference. If your students are able they can write their name on the blank line, or if they aren’t able you may do it for them saying each letter out loud as you do so, this way they will begin to become familiar with the letters in their names.
Happy Birthday Book


Materials: months of the year poster, 13 pieces of white cardstock, glue, scissors, black marker, student pictures
Take a cheap months of the year poster/chart from the teacher store (usually .99 cents) and cut apart. Glue one month to the top of each piece of cardstock, then glue the title piece “Months of the Year” to a piece of cardstock to make a cover page. Next, glue student photos to their correct birthday month page. Next to each student photo write their name and birth date with the black marker. When finished laminate and bind into a class birthday book. This book will be a big hit all year long and it’s a great way to learn the months of the year.
Chicka Chicka Boom Boom Look Who’s In Our Room!


Materials:Palm tree notepad, ABC stickers, picture of each student, cardstock, glue stick
Pre-program as many sheets of cardstock as you have students with the following phrase copied at the bottom “Chicka Chicka Boom Boom, look who’s in our room!”. Glue one palm tree to the middle of each piece of 8 1/2 x 11 cardstock (portrait). Next, glue one child’s picture to each sheet of cardstock. Use the ABC stickers to spell out each student’s name on the palm tree as if they are climbing the tree. Laminate and bind the pages into a class book that your students will be begging to read again and again!
Brown Bear Class Book


Materials:Picture of each student, cardstock, glue stick, Sharpie marker
Pre-program as many sheets of cardstock as you have students with the following phrase copied at bottom, “______, _______, who do you see?” (insert student’s name in the blanks) on the following page write at the top “I see ______ looking at me” (insert the name of the student on that page) Glue a picture of each student on to each sheet of 8 1/2 x 11 cardstock.
Santa Class Book

Materials: Picture of each student sitting on Santa’s lap, clipart of Santa or use Cricut Paper Doll Dress Up Cartridge to create book cover, cardstock, glue stick, Sharpie marker
Pre-program as many sheets of cardstock as you have students with the following phrase copied at bottom, “Santa, Santa, who do you see?” Glue a picture of each student sitting on Santa’s lap on to each sheet of cardstock. On the following page write at the top “I see ______ sitting on my knee” (insert the name of the student on that page) at the top of the page.
*Our class had the unique opportunity of seeing Santa in person and each student had a chance to sit on Santa’s knee. I was able to take pictures of each student and use these for our class book.
Our Pumpkin Book


Materials: cardstock, glue stick, one mini pumpkin per child, liquid glue, glitter, Sharpie marker, Q-Tips, picture of each student holding their pumpkin.
To make the pumpkins: Use the Sharpie marker to draw the outline of a Jack ‘O Lantern face on each mini-pumpkin. Have the students dip their Q-Tips in the liquid glue and fill in the outline with a very thin layer of glue. Next, shake glitter over the glue and let dry. These Jack ‘O Lanterns look Spooktacular when finished!
To make the book: Pre-program as many sheets of cardstock as you have students with the following phrase copied at bottom, “________’s pumpkin is _____________” Insert student’s name in the first blank and ask the student for an adjective to fill in the second blank. Some examples of adjectives my students used are: scary, silly, or creepy. Glue a picture of each student holding their pumpkin on to each page.
Our Valentine Book


Materials: Valentine cards that your class has given you, glue, cardstock, glue.
Pre-program as many sheets of cardstock as you have students with the following phrase copied at bottom “Roses are red, violets are blue, here is the Valentine I got from you”. Next, glue one Valentine card to each page, with the picture showing and write the child’s name underneath the card. Laminate all the pages, bind, and you’re ready to read this masterpiece to your class. It’s sure to be a big hit in the class library!
Cowboy Book


Materials: picture of each student, cowboy hat, stick pony, paper bag vest, bandana, cardstock OR Cricut Paper Doll Dress Up Cartridge
Read “Cowboy Roy” to your class. Take a picture of each student dressed in the hat, vest, and bandana “riding” the stick pony. Pre-program as many sheets of cardstock as you have students with the following phrase copied at bottom “I feel like a cowboy when ______” . Glue each student’s picture to a piece of cardstock. Ask each student when they feel like a cowboy and fill their responses in the blank for them. Next, laminate and bind the pages into a class book.
Dinosaur Names Book
Materials: small photo of each student, Sharpie, cardstock, Cricut Paper Doll Dress Up Cartridge
Pre-cut a large variety of dinosaur shapes using your Cricut Paper Doll Dress Up Cartridge. Have each student select their favorite dinosaur and glue to a piece of cardstock. Glue a small photo of each student (head shot) to the dinosaur shape in the place where the head is. Re-name your dinosaur using the student’s name; for example: Michael’s dinosaur would now be a “Michael-a-saurus” and Nicole’s dinosaur would be a “Nicole-a-saurus”. Use a sharpie to write the name of the new found dinosaur at the bottom of each picture then bind to make a class book. This activity is sure to tickle everybody’s funny bone and be a class favorite!
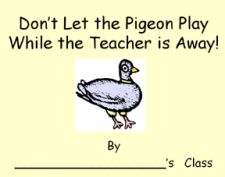
Don’t Let the Pigeon Play When the Teacher is Away
Download the free template for this class book on the blog HERE.


Pingback: Class Books - PreKinders