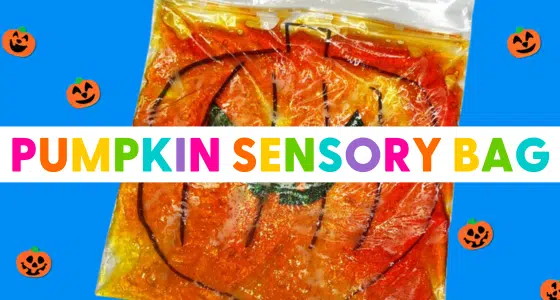


If your kids need more sensory experiences and fine motor practice, sensory bags are just what you need. This Jack-O-Lantern Halloween sensory bag is super easy to make and your kids will enjoy playing with them too! You don’t have to tell them that this Jack-O-Lantern sensory bag also has educational benefits.

Jack-O-Lantern Halloween Sensory Bag
Sensory play is just what is sounds like – play that involves the senses. While activities often engage several senses, the primary one used in most sensory bins or bags is touch.
A sensory bag has materials sealed inside so that the activity allows preschoolers to touch, explore, and manipulate materials but with no mess.
Some children may be hesitant to touch items that leave a mess on their hands or they may be reluctant to engage in any type of sensory activity at all. Sensory bags allow children to explore textures and different sensations without a lot of mess.
Sensory bags also encourage children to use the small muscles in their hands and fingers, developing fine motor skills.
As children talk about the materials and use different descriptive words, they are building conversation skills, vocabulary skills, and other language skills. Children can understand more about cause and effect, too. (I push here and the materials move there.)

Halloween Sensory Bag Supplies
You will need the following supplies to make your own Jack-O-Lantern sensory bags:
- Plastic storage bags (sandwich or gallon size)
- Clear hair gel (dollar store)
- Black craft foam
- Scissors
- Liquid watercolors (red and yellow liquid)
- Packing or duct tape
- Permanent marker (black)
Check out this research-based, playful learning unit in our curriculum shop!
Halloween Bundle
The Halloween Bundle includes 16 of our most popular preschool resources, including math and literacy small group activities, fine motor...
How to Make a Halloween Sensory Bag
To get started, use your permanent marker to draw the outline of a pumpkin on the front of the bag.
Next, squirt clear hair gel into your plastic zip top bag. This is the trickiest part of the whole process because you don’t want to over-fill or under-fill the bag.
If the bag is over-filled it may rip and start leaking. If it is under-filled it will be difficult for the children to move the pieces around.
Start out with a small amount of hair gel and test it out, then continue adding the hair gel until your bag has the desired amount.
Then, add a few squirts of the red and yellow liquid watercolors and start squishing the bag to mix the colors and create orange. You could also invite your kids to mix the liquid watercolors in the bag themselves for a fun, color-mixing science experiment!
Now it’s time to use your scissors to cut the eyes, nose, and mouth out of the craft foam. Don’t worry about perfection, simple shapes will do just fine. Add the foam pieces to the bag and squeeze all the air out of the top of the bag to prevent bubbles from forming inside. When all the air has been eliminated from the bag, seal it shut and add packing or duct tape around the edges to prevent the seams from leaking.
Invite your children to lay the bags flat on a table or the floor and use their fingers to push the eyes, nose, and mouth around.
Pumpkin Sensory Bag
Want to extend the sensory bag fun? When it’s Fall and pumpkins are everywhere! Turn one into this no-mess pumpkin sensory bag where your preschoolers can touch, squish, and explore the insides of a pumpkin.
There is a free I-spy printable activity sheet that goes along with the activity as well!
Watch the Video
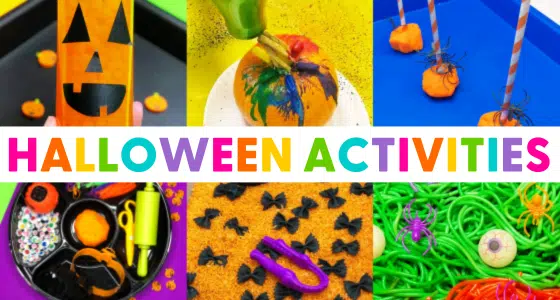
More Halloween Activities